
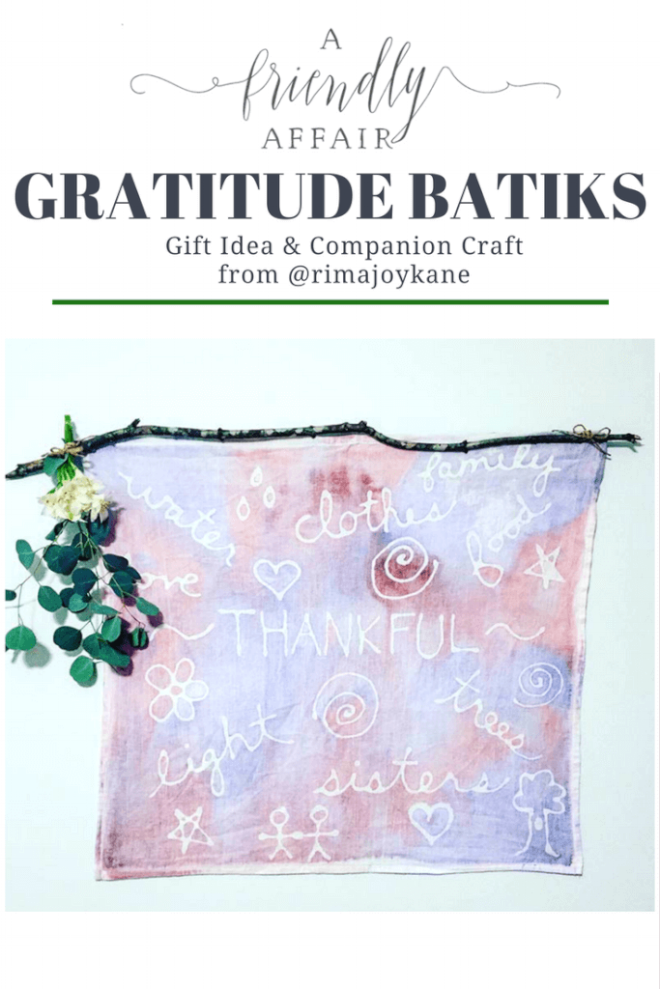
Cultivating Gratitude in Children
I am excited that @rimajoykane has agreed to let me share this wonderful African-Inspired Batik that is 1 – a brilliant way to engage the act of gratitude 2 – an excellent companion craft to The Water Princess by Susan Verde and 3 – a great Christmas present!
Rima Joy is one of those super art moms that loves books, loves, kids, and believes in process over product. If you aren’t already following her on Instagram, you should! She has neat ideas and the sweetest sentiments in her captions.
Triple Wammy! Here is what Rima has to say:
Now that the Thanksgiving season is upon us, I wanted to give my students one more story to help them connect the concept of gratitude to something outside of themselves. So, we all gathered around to read The Water Princess.
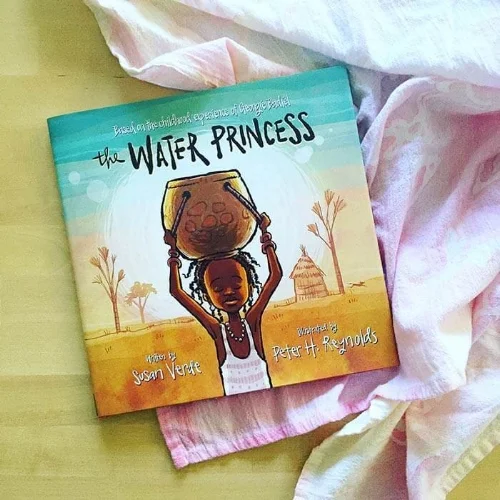
The book shares the true story of Georgie Badiel’s childhood experiences in Burkina Faso. Its lyrical text and gorgeous, earthy illustrations captivated the class as they stepped into Gie Gie’s world. Clean water is miles away, and every single day she and her mother must make an exhausting trip for the life-giving liquid.
The book is a powerful, eye opening story that can plant a seed of empathy in a child. After we finished reading there was so much wonderful discussion. “Couldn’t they take a break just one day?” “My shoulders would be so sore!” “How long did it take her to get to the water?” “Did she have time to go to school?”
We ended our time figuring out what we should do with a story like this–our brainstorming led us to two conclusions:
- Take action – Talk to parents about how we can help people like Gie Gie, and how we can be careful with our own resources
- Be thankful – Even though the story is a bit sad, Gie Gie and the other women turn the journey into a song. Plus, they were so thankful for the water.
The kids got it: If Gie Gie can be grateful, so could they!
We wanted to make something to help us remember what we learned from Gie Gie’s story. We took some inspiration from the arts of Gie Gie’s African homeland and set out to make our very own gratitude batiks!
Supplies needed:
- White flour sack dish towels
- Painters tape
- Paper and pencil for planning
- Crayola washable markers (make sure these are the washable version!!)
- Elmer’s blue gel school glue
- Dark acrylic paint in a variety of colors (we did primary and secondary colors)
- Sponge Brushes (one per paint color)
DAY ONE
Prepping for the project:
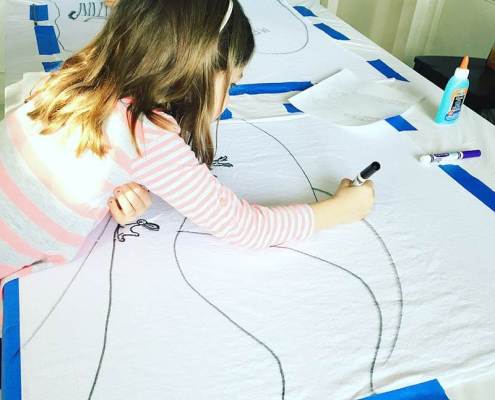
Using the painter’s tape, carefully tape down the dish towel onto a flat surface so it’s taut. This will prevent the fabric from bunching up, making it easier for the kids to work with it. If you are using a table that needs protecting, you can put a disposable table cloth or contractors paper underneath your fabric.
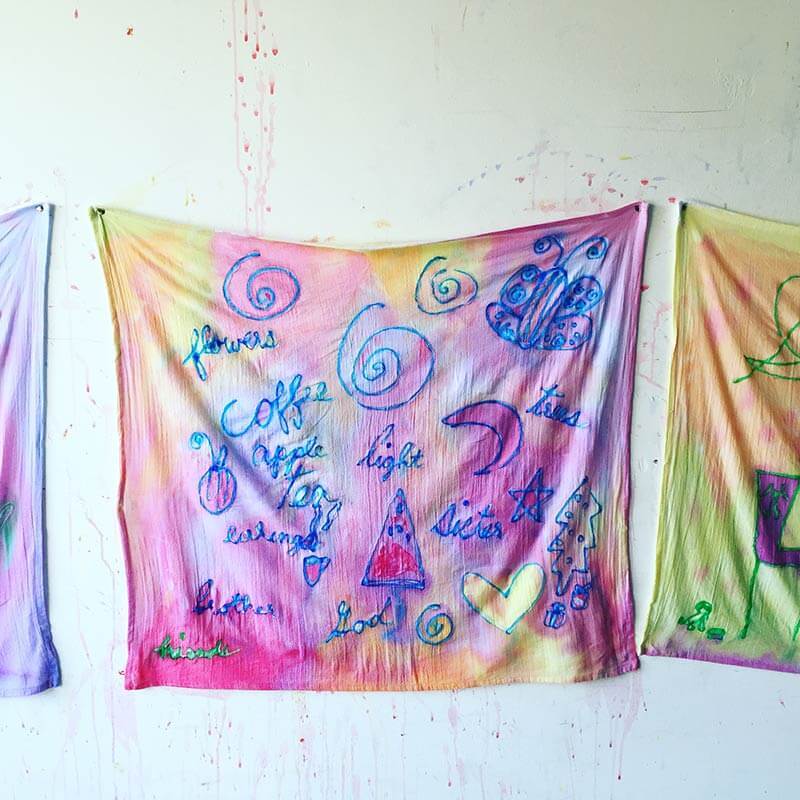
- Help your child brainstorm about things they are thankful for—they’ll use these ideas as the subject matter for their batik. I find that this process works best if the adult asks open ended questions rather than yes or no questions. For example, “Who are some people who have shown you kindness?” instead of, “Are you thankful for Daddy?” This helps them really work through a process instead of just agreeing or disagreeing with you.
- Your child can use the paper and pencil to plan out what they would like to put on their batik. They can either write out things they are thankful for, or draw a picture of something they are thankful for, or both!
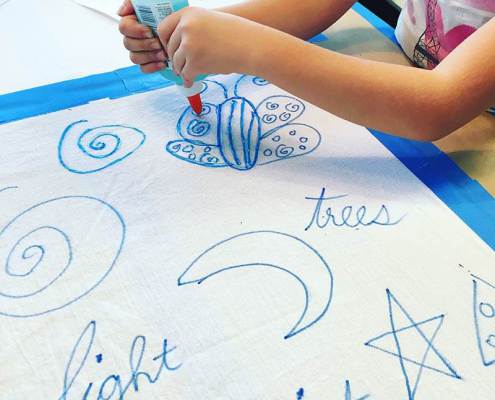
- Once they are finished with their plan, they can use the marker (again—make sure it’s washable!!) to draw or write on the fabric. Encourage kids to use big letters if they are writing out a word.
- After they are finished drawing on their fabric, they can trace over their designs with the glue. I have them do a practice squeeze on some scrap paper so they can get a feel for how the glue comes out.
- Allow the glue to dry for 24 hours.
DAY TWO
Prepping for the project:
Make fabric dye by thinning out the acrylic paint with water using this ratio—1T. paint to 1c. water. Put out a sponge brush to go with each color. Your child can continue to work at their original work station, or you can pin the fabric to a wall or fence.
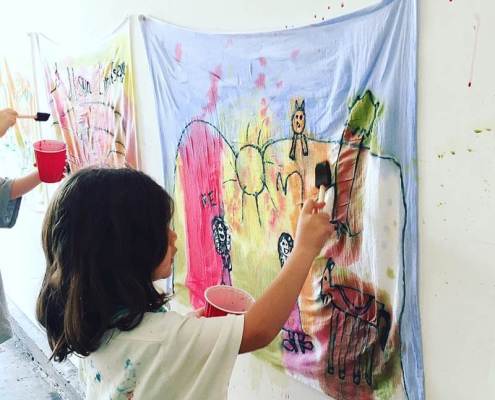

- Using the sponge brushes, your child can apply the paint to the fabric. For best results, the entire cloth should be painted.
- Once they are done applying paint, hang the fabric up to dry.
- After the fabric is dry, put it in the washing machine and wash on the hot cycle—the soap and hot water will remove all of the markers and the glue.
- Tumble dry on low or air dry and you’re done!

Thank you for letting me share with you today! I hope you enjoy this project as much as we did!
*This was a two-day class that had children ages 6-9 in it. All children were able to do this project completely solo; however, younger children could complete a variation of this project with just little assistance.*